Sunday, December 16, 2018

Crispy Treats

I'm pretty pleased with myself for perfecting this recipe. Turns out, it's a lot harder making the classic Rice Krispie treat than you'd think. Previous versions were too wet and thus sogged the cereal, or the sugar re-crystallized and the whole thing fell apart. But these! These have the perfect blend of crispness, sweetness, and chewiness that defines this childhood classic. These freeze and thaw very well should you need to make them ahead for a holiday party.  

INGREDIENTS
Marshmallow
- 3/4 cup salt-free chickpea aquafaba
- 1/2 tsp xanthan gum
- 1 tbsp vanilla extract
- 1 cup sugar
- 1/4 cup water
- 1/2 cup light corn syrup
- 1 tbsp agar powder

Crispy Squares
- 1/3 cup margarine
- marshmallow from above
- 1 tsp vanilla extract
- 8 cups crisp rice cereal

METHOD
Make the Marshmallow:
Line a baking sheet with parchment paper and lightly grease it.
1. Place the aquafaba in a small saucepan and bring to a boil. Reduce the heat and simmer until reduced to 1/2 cup. Pour into a mixing bowl (of a stand mixer if you have one) and let cool to room temperature. Place the bowl in the fridge to speed this up if you'd like.
2. When aquafaba is cooled, sprinkle in the xanthan gum. Whisk to stiff peaks with a hand mixer or stand mixer. Whisk in vanilla extract until incorporated.
3. Add sugar, water, corn syrup, and agar powder to a small sauce pan. Bring to bubbling over med/med lo heat, stirring constantly to keep the mixture from sticking to the bottom of the pan. Bring the mixture to firm ball temperature: 245 to 250 F (use a candy thermometer). Be patient. The temperature will rise, then plateau, then rise again. Resist the urge to crank the temperature up.
4. Once the sugar mixture has reached firm ball, whisk it into the aquafaba by drizzling it down the side of the bowl with the mixer running (I like to use a hand mixer for this part for greater control). Once all of the sugar had been incorporated, keep whisking until the bottom of the bowl is no longer hot (I like the stand mixer for this part).
5. Transfer the marshmallow to the prepared baking sheet and spread to about 1/2" depth. Let fully cool.
6. Once fully cool, lightly grease the top of the marshmallow. Cut into 2x2 squares and transfer to a cooling rack. Let dry at room temperature for at least 12 hours.

Make the Treats:
Lightly grease an 8x14 pan
1. Melt the margarine in a large pot over lo/med lo heat. Once melted, add the marshmallow pieces. Once again, be patient. Stir with a wooden spoon until all melted and smooth, then stir in the vanilla. Remove from heat, add in the cereal, and mix well.
2. Press the cereal mixture into the prepared pan with a silicon spatula. Allow to fully cool, then cut into squares. Enjoy!

Saturday, December 8, 2018

Snowballs

This is a fairly familiar Christmas cookie--nuts, fat, and flour coated in icing sugar. Growing up we had something like them called Russian Tea Balls. I like this version because the almond flour makes for a more crisp and smooth cookie than the one of my childhood. These are flavoured to be reminiscent of eggnog, but you could leave the nutmeg out of you'd like. 

INGREDIENTS
Makes 48 cookies
- 1/2 cup almond flour/meal
- 2 tbsp corn flour
- 1 tsp fresh ground nutmeg
- 1/2 cup icing sugar
- 1 cup margarine
- 1 tbsp rum
- 2 tsp rum extract
- 1 tsp vanilla extract
- 2 1/4 cups all purpose flour

- 1 1/2 cups icing sugar
- 2 tsp fresh ground nutmeg

METHOD
Line two large baking sheets with parchment paper
1. Whisk together almond flour, corn flour, nutmeg, and icing sugar. 
2. Add margarine and mix into a smooth paste with a wooden spoon. Add rum and extracts and mix well.
3. Add flour and mix with the wooden spoon into a ball of dough. 
4. Roll 2 tsp of dough into balls and place 1" apart on the baking sheets (2 dozen per sheet if they are big enough).
5. Refrigerate the balls of dough while you preheat to the oven to 350 degrees with the racks in the top and bottom third of the oven.
6. Whisk remaining icing sugar and nutmeg in a medium bowl. 
7. Bake for 20 mins, rotting the pans and switching racks after 10 mins. Cookies should be dry and firm and very slightly browned.
8. Let cool for 5 mins, then toss in batches in the icing sugar mixture. Let fully cool on a wire rack. If you are going to freeze these for later, do it now. 
9. Toss again in the icing sugar before serving. 

Saturday, December 1, 2018

Eggnog Snickerdoodles

I am emerging from a large research project just in time for the holiday season. So, the plan is to post as many holiday-themes recipes as I can in the next 3 weeks. It's going to be mainly baking, of course, but that's not a bad thing. First up are these snickerdoodles. They are basically a veganized Betty Crocker recipe with added nutmeg and rum for an eggnog-y taste. Remove both and you have a regular snickerdoodle. These are both crisp and chewy thanks to the magic of aquafaba, and are perfectly sized for a holiday cookie tray. 

INGREDIENTS
Makes 4 dozen
Cookie Dough
1 1/2 cups white sugar
1/2 cup margarine
1/2 cup vegetable shortening
1/3 cup aquafaba
1 tbsp golden rum
2 1/2 cups all purpose flour
1/4 cup corn flour
1/2 tsp fresh ground nutmeg
2 tsp cream of tartar
1 tsp baking soda
1/4 tsp salt

Topping
Mix together in a shallow bowl:
1/4 cup sugar
2 tsp cinnamon

METHOD
Heat oven to 400ºF. Line a baking sheet with parchment paper.
1. Cream sugar, margarine, and shortening in large bowl until fluffy (I use a heavy-duty whisk). Whisk in aquafaba, then the rum.
2. Sift in flours, nutmeg, cream of tartar, baking soda and salt. Mix into a dough with a wooden spoon.
3. Roll tablespoons of dough into balls, then roll in the cinnamon-sugar topping to coat. Place on the prepared baking sheet. 
4. Bake 8 to 10 minutes. The tops should be cracked and not too wet looking. Let cool on a wire rack.

Thursday, July 5, 2018

Smoked Portobello Bacon


This is the best thing I have tasted in a while. Mushrooms are bursting with umami, and together with the saltiness of the brine and the smokiness of the smoking the overall effect is very bacony. We have been enjoying them on BLTs (which will be even more awesome when our own tomatoes ripen), veggie burgers, and in scrambled tofu. 


INGREDIENTS
- 6-8 large portobello mushroom caps
- 1 recipe brine
- 3 cups applewood chips

METHOD
1. Wash the mushrooms and thickly slice (about 1/2"). 
2. Place sliced mushrooms in a large freezer bag, pour in brine, and seal. Lay bag flat in an appropriately sized casserole dish (this way of the bag leaks you won't have a disaster on your hands).
3. Refrigerate for at least 24 hours, turning the bag over regularly to ensure all the pieces get evenly marinated. 

ON SMOKING DAY: you can smoke these in a smoker, if you have one, per its instructions. Or, you can turn your BBQ into a smoker per these instructions.
1. Soak the applewood chips (or smoking chips of your choice) in water for 30 mins. If you like, use foil to cover the holes in your BBQ lid where the rotisserie is supposed to go so that too much smoke does not escape.
2. Use a smoke box, or make a smoking packet out of aluminum foil--wrap the chips in foil and poke holes in it to allow the smoke to escape. Don't make the packet too big--you want some depth to your chips so they can smoulder and smoke away without burning up too fast.
3. Remove the grill from one side of the BBQ and place the packet on the heat plates over the burner. Turn the burner on high.
4. While the packet is heating, place the mushroom slices on the opposite grill and bun warming rack. I like to place mine on an old cooling rack and then place that on top of the grill. 

5. Once the packet begins to smoke, reduce the heat and close the lid. You want to keep the temperature between 250 and 300 for about 45 mins, but you also want the chips to keep smoking. Basically this means a higher heat at the beginning and then lower heat towards the end as the chips burn. If the chips stop smoking too early, just raise the heat to get them going again and then lower it. 
6. The bacon will be done in about 45 mins. The outside should be leathery but the pieces should not be dried out. Remove smaller pieces first if necessary. 

The bacon can be stored in the fridge and fried up (if you want) when needed. I like the thicker slices because they don't dry out on the grill and can be sliced thinner later if necessary. 

Sunday, July 1, 2018

Dosa

Welcome to post two of two of fermented breads! If you made the injera recipe, you will find the method for this recipe very similar. And, like injera, the bread is a wonderful gluten-free addition to a meal. You may toss the first few as you get used to spreading out the batter but it is worth persevering to get it right. These are best served fresh, so halve the recipe if you need to. 

INGREDIENTS
Makes 2 dozen
- 2 cups basmati rice
- 1 cup red lentils
- 1 tbsp fenugreek seeds
- 2 tsp. salt
- margarine
- water for thinning, if needed

METHOD
1. Soak the rice in cold water overnight. In a separate bowl, soak lentils and fenugreek in cold water overnight. 
2. Drain the rice (discard the water) and add to a blender. Drain the lentils/fenugreek (save the water), and add to the blender with the rice. Add the salt and blend on high speed, adding as much of the lentil soaking water as needed to make a thin batter (like crepe batter). Add fresh water if needed.
3. Transfer the blended mixture to a large glass jar, and affix a piece of cloth over the mouth of the jar. Let ferment at room temperature for about 2 days, or until bubbly and foamy.
4. Stir the batter, adding water if needed to thin it if needed. It should still coat the back of a spoon but not be too thick. 
5. Preheat a non-stick pan over medium heat. When pan is heated, add 1/4 cup of batter to the pan. Use the back of a spoon to speed the batter thinly--start in the middle and quickly spread outward in a circular motion. 
6. Cook until the does is dry and the edges start to curl up a bit. Remove from heat to a cooling rack. Spread a thin layer of margarine over the surface of the dosa, and roll while still warm. Store under a towel until ready to serve. Repeat with remaining batter. 

Tuesday, June 19, 2018

Injera

The key to injera is getting comfortable with fermentation. Just like sourdough bread, injera gets its flavour from wild (as opposed to commercial) yeast. But unlike sourdough, this recipe is much easier to prepare. A few days out on the counter and this batter will be happily bubbling away and ready to be made into Ethiopian flatbread.  It's a great introduction into the world of fermentation! The bread is gluten free but still rolls just like a crepe and is durable enough to scoop up whatever tasty stew you make. 

INGREDIENTS
Makes one dozen
- 3 cups teff flour
- 4 cups water
- 1 tsp baking powder
- 1/2 tsp salt

METHOD
1. Mix together teff flour and water. Pour into a large, clean glass or ceramic container (I use a 56 oz canning jar). Keep in mind that the batter will expand by 1/3 or more, so make sure you container is big enough. Secure a piece of cloth over the mouth of the container so everything can breathe--I put a cloth napkin over the mouth of the canning jar and secure it with the metal ring.
2. Let the batter sit for 2 to 3 days, stirring 3 times a day, until better begin to bubble and rise.
3. Once the batter is bubbly, stir in the baking powder and salt.
4. Let the batter sit while you heat a 10" non-stick pan over medium to med-hi heat.
5. Lightly oil the pan. Pour 1/2 cup of batter into the pan and tilt to coat (thin batter with water if necessary). Cook until the injera has bubbles all over, then cover with a lid so the injera can steam for 2-3 minutes. Regulate the heat so the bread does not burn.
6. Remove the injera to a cooling rack and roll it while warm. Cover with a towel to keep warm. Repeat with the remaining batter. 

Wednesday, April 11, 2018

Wagon Wheel Cake

This cake is insane. It's massive, probably too sweet, has 5 separate elements, and is totally awesome!  Of course, my health conscious mother never bought us Wagon Wheels when my brothers and I were young, and oh, how we jealously pined for them when other kids brought them to school for lunch! When Vegan Mom and I were dating (and not yet vegan) in university, we used to keep ourselves motivated to study through the positive reinforcement of Viva Puffs. This cake evokes all of those memories, and is simply a lot of fun to make and eat. 

INGREDIENTS
- about 1 1/2 cups raspberry jelly

Cake
INGREDIENTS
- 227g all purpose flour
- 65g cocoa
- 1 1/2 tsp baking soda
- 3/4 tsp baking powder
- 1/2 tsp salt
- 1 1/4 cup soy milk
- 1 tbsp apple cider vinegar
- 1/4 cup water
- 1 cup sugar
- 1/2 cup canola oil
- 1 tbsp vanilla

METHOD
Preheat oven to 350 degrees
1. Grease two 10 inch round cake pans.  Cut out two circles of parchment paper to fit in the bottom of the pans.  Put the parchment papers in the bottom of the pans and grease it.  Flour both pans.
2. Sift flour, cocoa, baking powder, baking soda, and salt into a bowl.  In a separate bowl, whisk chocolate soy milk and vinegar together.  Add remaining ingredients and whisk well to blend.
3. Add dry ingredients and gently whisk until blended.  Don't overdo it.
4. Divide batter evenly between the two pans.
5. Bake for 22-24 mins, or until a toothpick comes out clean.
6. Cool on wire racks for 10 mins, then flip the pans over the remove the cake.  Remove the parchment paper.  Let them fully cool.

Graham Cookie Layer
INGREDIENTS
- 3/4 cup all purpose flour
- 3/4 cup whole wheat flour
- 2 tbsp dark brown sugar
- 1/8 tsp salt
- 1/2 tsp cinnamon
- 1/2 tsp baking powder
- 1/4 cup vegetable shortening
- 1/4 cup maple syrup
- 2 tbsp soy milk

METHOD
1. Mix together dry ingredients. Cut in vegetable shortening with a pastry cutter to the size of small peas. 
2. Add syrup and soy milk and bring together into a ball. Add a tiny splash more soy milk if needed.
3. Divide dough into two equal pieces. Roll and trim each into a 10" circle on a piece of parchment paper, using the cake pan as a guide. Don't worry, you can trim it more after it is baked. 
4. Place each piece of parchment/dough circle on a baking sheet. Place in the fridge to cool for 30 mins.
5. Heat the oven to 350 degrees. Bake one the middle and upper rack for 10 mins, rotating and switching the racks after 5 mins. Cookies should dry on the top and only very, very lightly brown. Do not over bake.
6. Remove from pans (parchment and all) to a cooling rack. When cooled, trim as needed with a small sharp knife using the cake pan as a guide. 

Marshmallow (from Plantified)
INGREDIENTS
- 3/4 cup salt free aquafaba
- 1/2 tsp xanthan gum
- 1 tbsp vanilla extract
- 1 1/2 cups sugar
- 2 tsp agar powder
- 2 tbsp glucose syrup
- 1/3 cup water

METHOD
1. In a large bowl, whisk aquafaba and xanthan gum to stiff peaks with a hand mixer. Whisk in vanilla. Set aside.
2. Bring the sugar, agar, glucose, and water to boiling in a small saucepan over medium heat. Bring to 250 F, stirring regularly/constantly to keep the mixture from sticking to the bottom of the pan. Be patient. The sugar will quickly jump in temperature, plateau, then rise again. Resist cranking the heat to hurry the process along.
3. Slowly stream the hot sugar mixture into the aquafaba, constantly whipping it in with the hand mixer. When the sugar mixture is fully incorporated, keep whipping the mixture until it returns to room temperature (more or less--the bottom of the bowl should not feel warm). You can do all this with a stand mixer, but I find that the sugar mixture likes to get caught up around the top of the beater, so using a hand mixer is better). 

Ganache
INGREDIENTS
- 1/2 cup light coconut milk
- 200g bittersweet vegan chocolate chips
- 2 tbsp margarine

METHOD
1. Heat coconut milk to bubbling in a small saucepan over medium heat. 
2. Remove from heat and add chocolate chips and margarine.  Stir until everything is melted and smooth.  Set aside to cool completely. 

TO MAKE THE CAKE!
1. Bake and cool the cake. Level the top of the cake, if necessary (i.e. make sure it is flat and not domed). 
2. Bake and cool the graham cookie layer. Trim to fit on top of the cake (you can do this while the cookie is still slightly warm if you want). 
3. Place one of the cake layers on a serving platter. Spread 3/4 cup of raspberry jelly on top. Place one of the graham cookies on top of the jam. 
4. Repeat step 3 with the remaining cake, jelly, and graham cookie, and set aside.


5. Make the marshmallow. The marshmallow will set fairly quickly, so be prepared. Spread 7/8 of the marshmallow on top of the cake/jam/cookie layer in your serving platter. Put the second cake/jam/cookie layer on top of the marshmallow (making sure the cookie side is down and the cake layer on top). Gently press down and use an icing spatula to smooth the sides. Use the remaining 1/8 of the marshmallow to aid in this endeavour. 

6. Let the marshmallow fully set. I like to put the cake in a cool place for this step because it makes the ganache step easier.
7. Make the ganache and let cool to room temperature.
8. Spread a thin layer of ganache over the entire cake, like you would a crumb coat of butter cream. Set aside in a cool place (the fridge) to set.
9. Use the remaining ganache to cover the cake. Set aside in a cool place to set.

Friday, February 23, 2018

English Muffins

I love English muffins but I find making them from a batter to be a real pain. It's hard to get quality muffin rings here, it's not easy to make them a consistent size, and it seems to take forever to make them. So, I reworked a Reinhart recipe by significantly upping the liquid and working the dough more like a ciabatta. The end result is a delicious muffin with some respectable air holes in the dough. Not as many as with a batter, but still pretty good. A stand mixer is essential here to get the gluten to develop properly. You also need a griddle, preferably one big enough to hold 8 muffins at a time so you can whip these off in three batches. 

INGREDIENTS (by weight, except where indicated)
Makes 24. Cut in half if needed. 
- 1 oz apple cider vinegar
- 27 fl oz soy milk at room temperature
- 1 lb 14 oz bread flour
- 22g sugar
- 16g instant yeast
- 16g salt
- 1.5 oz vegetable shortening

METHOD
1. Mix the vinegar into the soy milk, then add to the rest of the ingredients in bowl of a stand mixer.
2. Using the batter attachment, mix together until combined. Increase the speed to med-lo/med and keep mixing until the dough collects around the beater (this will take about 5-7 mins). 
3. Switch to the dough hook. Knead the dough on med-lo/med speed until it no longer sticks to the sides of the bowl (this will take a few minutes).
4. Transfer to a large, well-oiled bowl. With oiled hands, stretch and fold the dough 2-3 times. Let rest for 5 mins and stretch and fold 2-3 times again. Cover and let rise at room temperature. 
5. While dough is rising, oil enough baking sheets to hold 24 muffins.
6. When dough has doubled in size, shape into 2.5 oz balls. Use oiled hands as necessary, and try not to degas the dough. Place on the prepared sheets.
7. Cover dough with cling wrap. Place a empty cookie sheet on top of the dough. Gently press down to flatten the dough into pucks. Let the dough rise with the sheet on top. If the sheet is too heavy and seems to be flattening the dough, don't use it. Just keep pressing the dough down with your fingers throughout the rise to keep a puck shape. 
8. While dough is rising, preheat the oven to 350 degrees, and get a griddle heating to around 350 degrees. 
9. Working in batches, cook the muffins on the griddle for about 4 mins per side. These get a great rise on the griddle, so use your fingertips to press and keep them into a puck shape when they first go on the griddle.
10. Transfer to a baking sheet and bake in the oven for 8 mins. Transfer to a wire rack to cool.

TIPS:
1. Make sure to pinch the balls of dough tightly to seal the dough together. You need the good dough ball integrity (if that makes any sense) to get these to rise correctly.
2. Don't let the dough get too warm or it will get really hard to work with. Room temperature all the way.
3. Don't let the dough over-rise when shaped into balls. You want to bake these on the way up, so don't let them double.

WHAT IF I DON'T HAVE A STAND MIXER?!
Never fear! You can still make these. It's going to take some muscle but it can be done. To help you. here is a picture essay.

First, make sure to dissolve the yeast in the liquid before adding it to the flour.

Second, use a strong wooden spoon to bring the dough together. I actually prefer this spurtle because you can muscle through the dough without too much resistance. When it looks like this, let the dough rest for a few minutes. Then get back at it. The idea is to get the dough to gather around the spurtle in a ball. A vigorous circular motion will accomplish this. If you feel the gluten offering too much resistance, let the dough rest for a few minutes and then try again. It should pull away from the sides of the bowl and gather around the spurtle.
 When you have a fairly smooth dough, transfer it to to a lightly floured surface. You want enough flour to keep the dough from sticking.
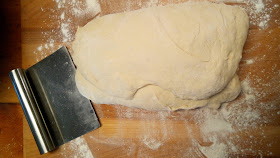
 With the help of a pastry scraper, stretch and fold the dough like a letter. If you don't know what a letter is or how to fold one, ask your parents (or maybe even your grandparents).
 Rotate the dough 90 degrees and stretch and fold a second time.
Transfer the dough to a well-oiled bowl and turn to coat. With oiled hands, stretch and fold the dough  a third time. Let the dough rest for 5 mins.
What you are doing is building a gluten structure, and you should feel the dough firm up as you stretch and fold. When you can shape the dough into a ball like what you see below, your stretching and folding is done. Just keep the dough and your hands oiled, and stretch and fold until you reach perfection. Then cover and let rise.
 Good gluten structure will give you a good rise.
Now it's time to shape some balls of dough! I keep the dough on my fingertips, using my thumb to push the middle of the dough down while the fingers of my other hand bring the sides of the dough up. You should feel the bounciness of the gluten and a firm ball forms and firms up. If the dough gets too sticky, just lightly oil your hands.

The key is to seal the dough into a tight ball. This will give you a good rise.
 Let rise on a well-oiled piece of parchment per the recipe above.
 A good griddle is your friend.
 Flip and bake per the recipe above.